How to Use Adobe InDesign 5 Flowing Text YouTube
This super fast tutorial goes over how to create / generate / add lorem ipsum text inside Adobe InDesign. Lorem ipsum text is the standard way in the design industry to fill out pages with sample text to demonstrate what a page will look like once fully completed with content. It's VERY easy to do inside InDesign and a very useful thing to do.
How to insert text in InDesign (Type Tool/Text Box) YouTube
How to generate lorem ipsum type in Adobe InDesignCheck out my Photoshop and Illustrator kits! 🦄 https://bit.ly/3aWqZpFNOTE: Depending on whether you right.

How to Add Text to InDesign 8 Steps (with Pictures) wikiHow
CreativePro 24.9K subscribers Subscribe 9.2K views 4 years ago InDesign Tutorials In this video, Erica Gamet shows us how to customize InDesign's default placeholder—or dummy—text. If.
How to add and format text in Adobe InDesign — Paper + Oats
2 This answer is not useful Save this answer. Show activity on this post. This is not for InDesign, however it is possible to apply the Roughen filter in Illustrator to text to give it a very slightly irregular look. Obviously you can mess around with the size and detail sliders to tweak the effect yourself.

How to Add Text to InDesign 8 Steps (with Pictures) wikiHow
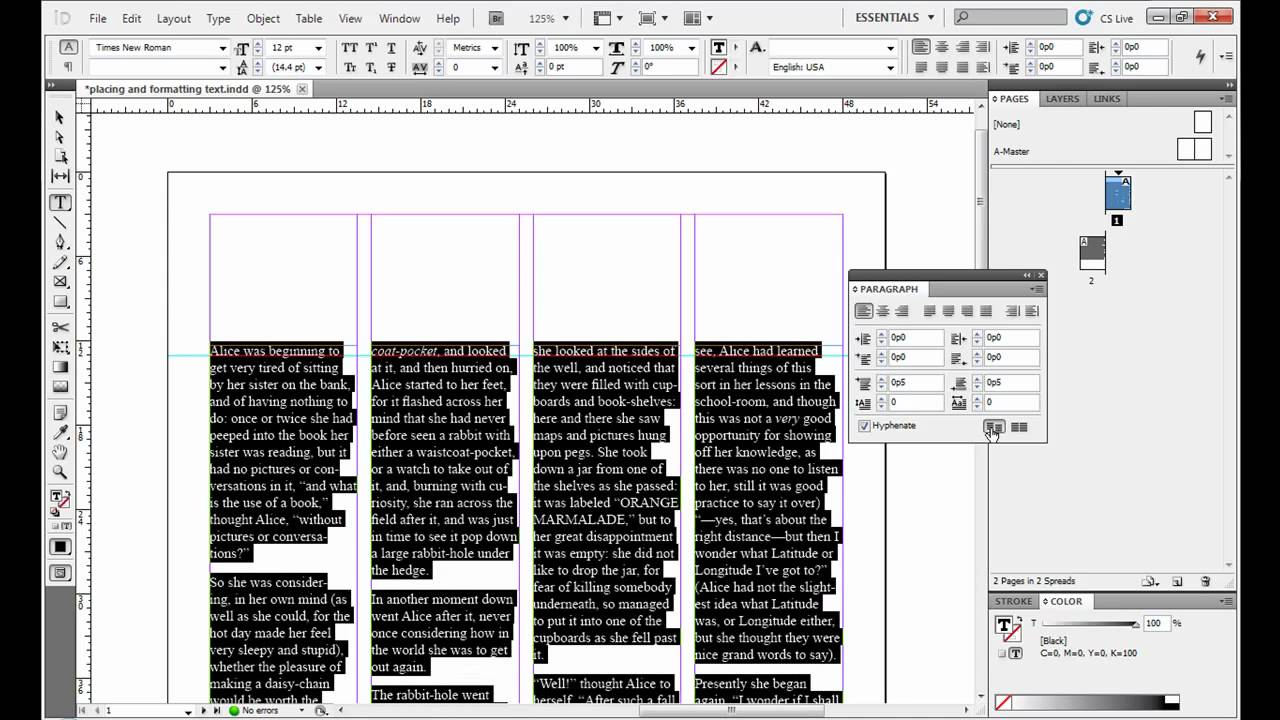
Adding Text in InDesign In other programs, you can just click once and start typing, but in InDesign you have to draw a frame (some people call it a text box) for your text to live inside. To do this, click the text tool in the left toolbar, or use the shortcut, the letter T on your keyboard.

InDesign GREP Essentials How to Add, Delete, and ReArrange Text CreativePro Network
Join Daniel Walter Scott for Lesson 39: How to add placeholder text & lorem ipsum & get a word count in InDesign of Adobe InDesign Fundamentals on CreativeLive. Available with seamless streaming across your devices. Get started on your creative journey with the best in creative education taught by world-class instructors. Watch a free lesson today.
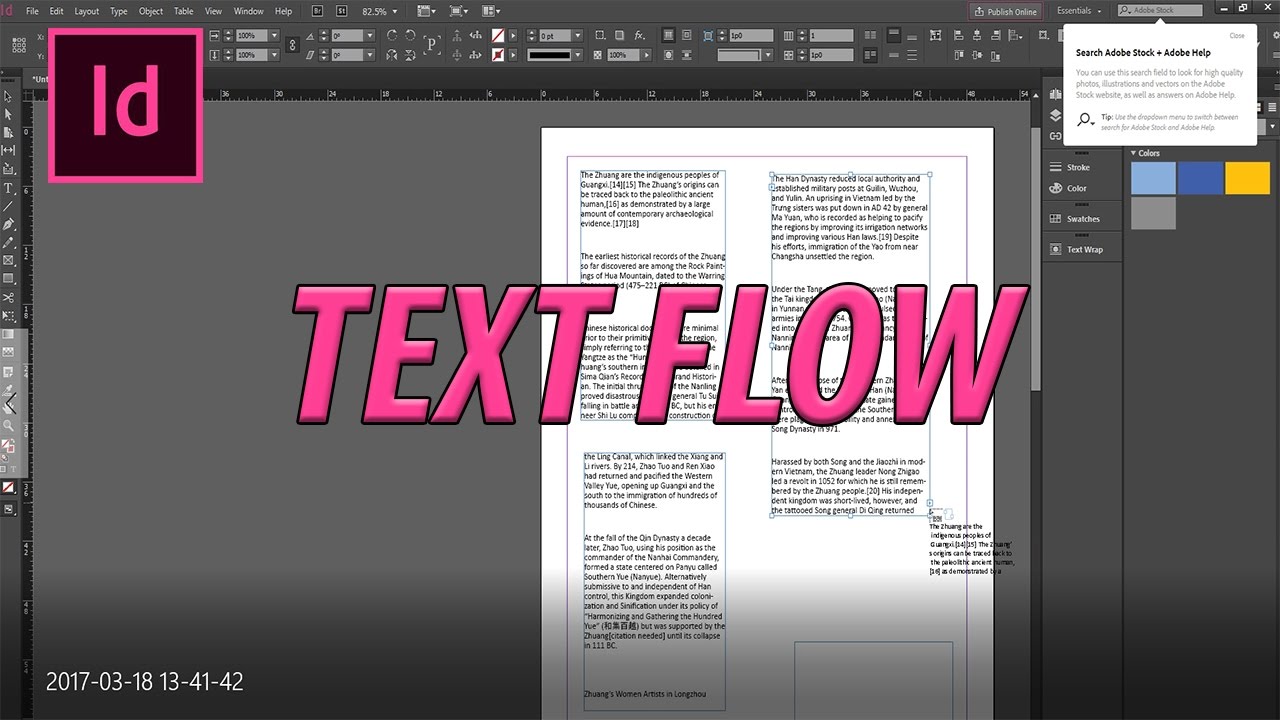
Placing and Formatting Text in Adobe InDesign YouTube
Vertical Justification is a text frame property, not a text property, and has nothing to do with how your text is aligned horizonatally. As I said, InDesign is style-driven, and all of these things can, and should, be controlled by properly defining styles for the various types of paragraphs in your document.

How to Add Text to InDesign 8 Steps (with Pictures) wikiHow
1 Correct answer Frans v.d. Geest • Community Expert , Jan 19, 2022 I've seen this indeed with Track changes (as Bob also suggested), but try see if saving it as .docx or a .doc makes a difference (that worked for me in some cases). As last resort you could try saving it as .rtf. 1 Upvote Translate Jump to answer 8 Replies Jump to latest reply
InDesign plugin for random text variations in size and position Graphic Design Stack Exchange
© 2023 Google LLC This is a great hidden gem within InDesign, which not a lot of Graphic Designers know about. The tutorial is less than 2 minutes, and is an incredibly quick.

How to Add Text to InDesign 8 Steps (with Pictures) wikiHow
Learn how to insert placeholder text into InDesign with a simple menu option. This is great when working on a design but you have yet to receive or create th.

How to insert text in indesign footsafas
Effects Dialog. To access the Effects Dialog go to Window > Effects or use Shift+Control+F10 . This box controls opacity, stroke, fill, and text, as well as a class of effect to apply. By default, the effect is Normal . These affects govern the content within the frame.
:max_bytes(150000):strip_icc()/C4uMn0Lj13-c549fe2178f64a43bf24dd0ccc6e9fa9.png)
How to Add Text Effects in Adobe InDesign
Learn how to add placeholder text to your InDesign document, using the built-in Lorem Ipsum generator or your own custom text. Placeholder text helps you visualize the layout and design of your document before adding the final content. Follow the easy steps in this tutorial and create your own placeholder text in minutes.
Formatting Text in Adobe InDesign YouTube
Screencasts. This is a great hidden gem within InDesign, which not a lot of Graphic Designers know about. The tutorial is less than 2 minutes, and is an incredibly quick method, for rapidly adding dummy text into an any type of indesign document. This is a great little time saver, which I'm more than certain you will use very frequently.

How to Add a New Font to InDesign 12 Steps (with Pictures)
Say you've designed it, and the copy writing is happening afterwards, what you can do is work out what the word count is. So check the work count, you have your cursor flashing, 'Type Tool', cursor flashing in here anywhere, go to 'Window' and go to 'Info'. And that should, after a second, tell you this is 347 words.
:max_bytes(150000):strip_icc()/Kp2SATkOqj-547a9e42a09648448442c0a8400c71b1.png)
How to Add Text Effects in Adobe InDesign
Step 1. Before editing the text, you will need to make sure you have the Workspace set to Typography to ensure all of the menu settings are visible. To do this, find the Workspace menu in the top-right corner of the screen and click on it to open up the menu. Click on the Typography option to switch to this Workspace. Advertisement.
The Fastest Way To Add Dummy Text In InDesign YouTube
With the insertion point still in the text, triple-click to select "Bistro & Bar.". Locate the Character controls of the Properties panel at the right. From the Font Style menu, select Bold. Click to view larger image. Click outside the text frame to deselect the text. Choose File > Save to save your work.